Have you ever stared at a tub of store-bought hummus and wondered if you could make it yourself? Yes, You can. And you may never buy it from a store again, once you try this homemade hummus recipe.
Classic Hummus from Scratch is creamy, smooth and full of flavor. Additionally, it only needs a few simple ingredients. Which is best of all, naturally vegan and gluten-free, so almost anyone can enjoy it.
In this guide, I’ll walk you through every step. This will help you learn the history behind this dish, the best tips for a silky-smooth texture and answers to common questions. By the end of thif you’ll be able to make an authentic hummus recipe just like the ones served in Middle Eastern kitchens for centuries.
Historical and Cultural Background
Origins of Hummus
Hummus has a long history. Chickpeas have been eaten in the Middle East for thousands of years. Many food historians believe early versions of hummus appeared in the region as far back as the 13th century, though simple chickpea dishes go back even further.
The word “hummus” actually means “chickpeas” in Arabic. Over time, cooks added tahini, lemon and garlic to create the smooth dip we know today.
Traditional Middle Eastern Significance
In many Middle Eastern countries, hummus is more than just a snack. It’s a symbol of hospitality. Families often serve it when guests arrive. Sharing a bowl of hummus is a way of welcoming someone into the home.
Countries like Lebanon, Israel, Syria, Jordan and Egypt all have their own versions. Each region adds its own twist, but the heart of the dish stays the same: chickpeas, tahini, lemon and olive oil.
Regional Serving Customs
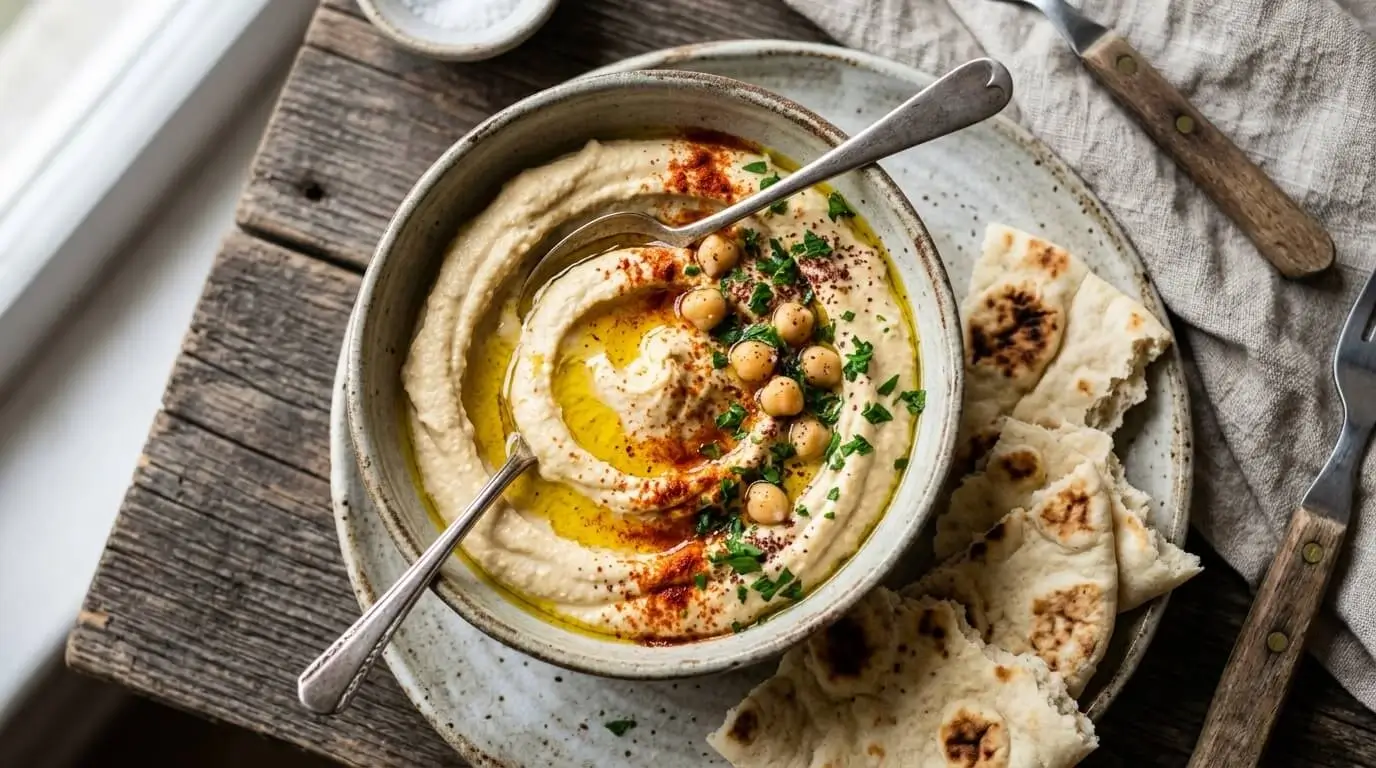
In traditional Middle Eastern meals, hummus is usually spread on a plate rather than piled in a bowl. Cooks often make a swirl pattern with a spoon, then drizzle olive oil into the center. Toppings like paprika, parsley, or whole chickpeas finish the look.
It’s almost always served with warm pita bread, fresh vegetables, or as part of a larger spread called “mezze.”
Why This Recipe Works
This traditional Middle Eastern hummus recipe works because it focuses on a few key things:
- Well-cooked chickpeas make hummus smooth rather than grainy.
- Peeling the chickpea skins (a small but important step) removes texture that can make hummus feel chalky.
- Blending tahini and lemon juice first creates a creamy base before the chickpeas go in.
- Ice water is the secret trick many chefs use to get that whipped, cloud-like texture.
Each step is simple, but together they create restaurant-quality results at home.
Ingredients
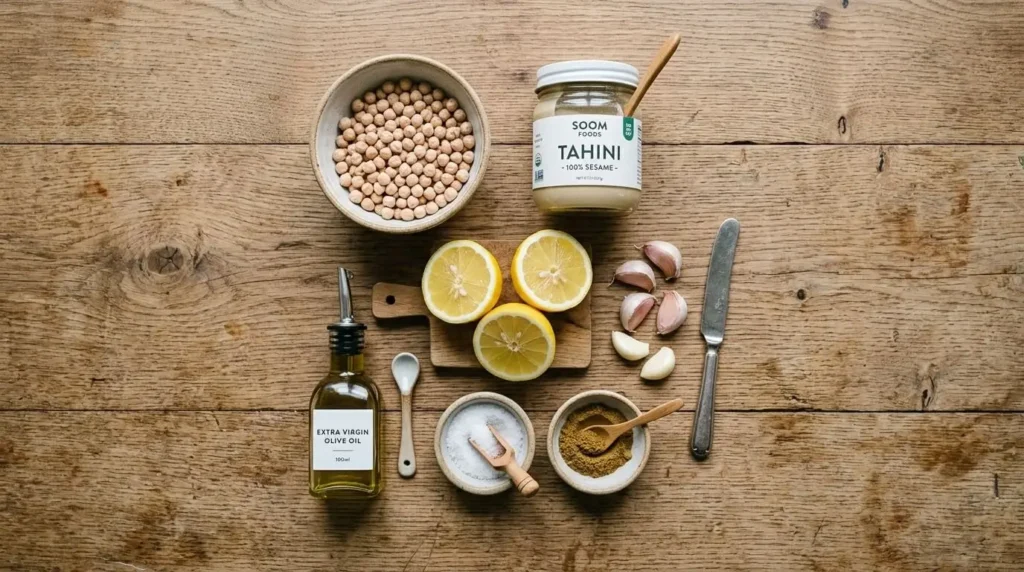
Here’s everything you need for this creamy hummus recipe.
- Dried chickpeas -1 cup (200g), soaked overnight (or 2 cans of cooked chickpeas, 15 oz/425g each)
- Baking soda – 1/2 teaspoon (for soaking) + 1/2 teaspoon (for cooking)
- Tahini -1/2 cup (120g)
- Lemon juice – 1/4 cup (60ml), freshly squeezed
- Garlic – 2 cloves, minced
- Olive oil – 3 tablespoons (45ml), plus more for serving
- Ice water – 1/4 to 1/2 cup (60–120ml)
- Salt – 3/4 teaspoon, or to taste
- Ground cumin – 1/2 teaspoon (optional)
- Paprika – for garnish
- Fresh parsley – chopped, for garnish
Ingredient Notes
- Tahini is a paste made from ground sesame seeds. It gives hummus its nutty flavor and creamy texture.
- Dried chickpeas make smoother hummus than canned chickpeas, but canned chickpeas work well too and save time.
- Ice water helps whip the tahini into a light, fluffy texture before adding other ingredients.
Equipment Needed
- Food processor or high-speed blender
- Large pot (for cooking chickpeas)
- Fine mesh strainer
- Measuring cups and spoons
- Rubber spatula
- Serving bowl or plate
Quick Recipe Facts
- Prep Time: 15 minutes
- Cook Time: 45 minutes (if using dried chickpeas)
- Total Time: 1 hour
- Servings: 6 (about 1/4 cup each)
- Cuisine: Middle Eastern
- Diet Type: Vegan and Gluten-Free
- Difficulty Level: Easy
Step-by-Step Instructions
Step 1: Soak the Chickpeas
If using dried chickpeas, soak them in water with 1/2 teaspoon baking soda overnight or for at least 8 hours.
Step 2: Cook the Chickpeas
Drain and rinse the chickpeas. Add them to a pot with fresh water and 1/2 teaspoon baking soda. Bring to a boil, then simmer for 45 minutes to 1 hour, until very soft. (If using canned chickpeas, simply drain, rinse and simmer for 10 minutes.)
Step 3: Peel the Skins (Optional but Recommended)
While chickpeas are still warm, rub them gently between your hands or a towel to loosen the skins. Skim off and discard the skins that float to the top.
Step 4: Blend the Tahini and Lemon Juice
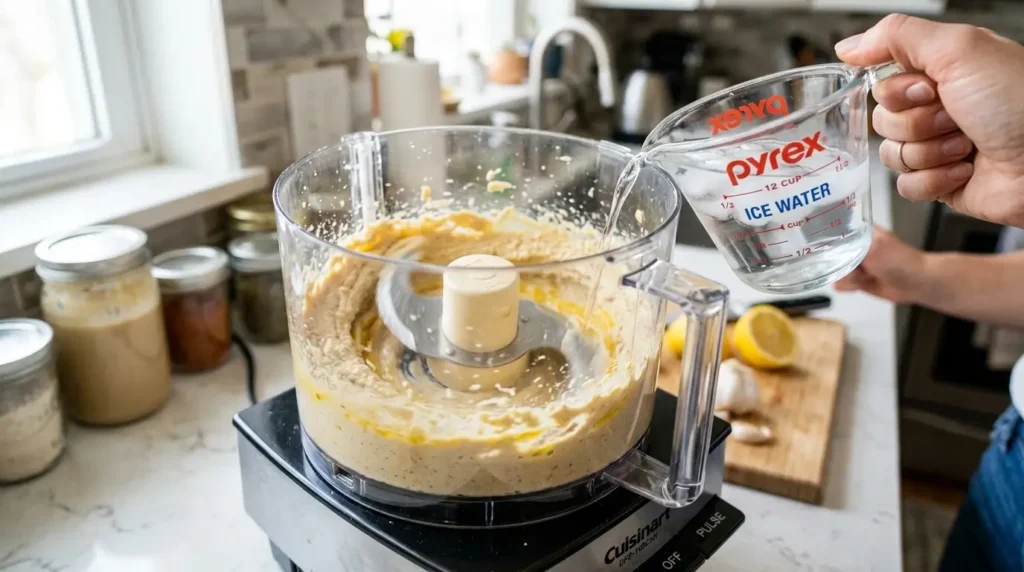
In a food processor, blend the tahini and lemon juice for about 1 minute. This step makes the tahini light and creamy.
Step 5: Add Garlic and Spices
Add the minced garlic, salt and cumin. Blend again for 30 seconds.
Step 6: Add the Chickpeas
Add the cooked, peeled chickpeas. Blend until thick and slightly chunky.
Step 7: Add Ice Water
With the processor running, slowly pour in ice water, a little at a time, until the hummus turns smooth and creamy.
Step 8: Drizzle in Olive Oil
Add the olive oil while blending one last time, until fully smooth.
Step 9: Taste and Adjust
Taste your hummus. Add more salt or lemon juice if needed.
Step 10: Serve
Spread onto a plate, swirl with a spoon and drizzle with olive oil. Sprinkle with paprika and parsley.
Numbered Step Summary
- Soak chickpeas overnight.
- Cook chickpeas until soft.
- Peel skins (optional).
- Blend tahini and lemon juice.
- Add garlic and spices.
- Add chickpeas and blend.
- Add ice water for creaminess.
- Add olive oil.
- Taste and adjust seasoning.
- Serve and garnish.
Expert Chef Tips for Ultra-Creamy Hummus
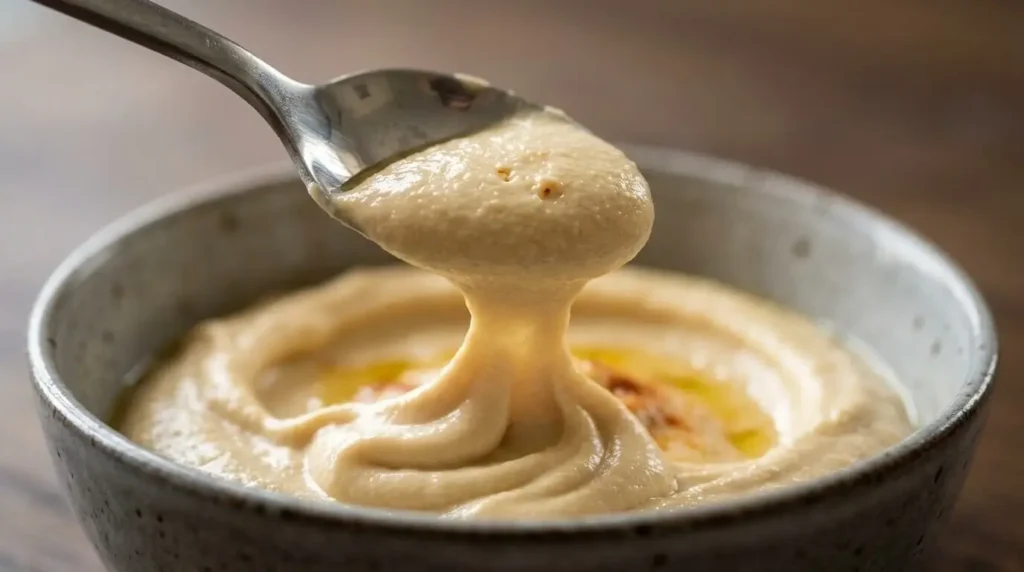
- Use ice water, not room temperature water. Cold water helps create a fluffier texture.
- Don’t skip blending the tahini first. This step alone makes a big difference.
- Cook chickpeas longer than you think you need to. Soft chickpeas blend much more smoothly.
- Peel the skins if you have time. It’s optional, but it removes a slightly tough texture.
- Blend longer than feels necessary. Many beginners stop too soon. Two to three minutes of blending is normal.
Common Mistakes to Avoid
- Using undercooked chickpeas. This leads to grainy hummus.
- Adding too much liquid too fast. Pour slowly to control the texture.
- Skipping the tahini-lemon blending step. This step builds the creamy base.
- Using old, dried-out tahini. Fresh tahini blends much better.
- Over-salting before tasting. Always taste as you go.
Serving Suggestions
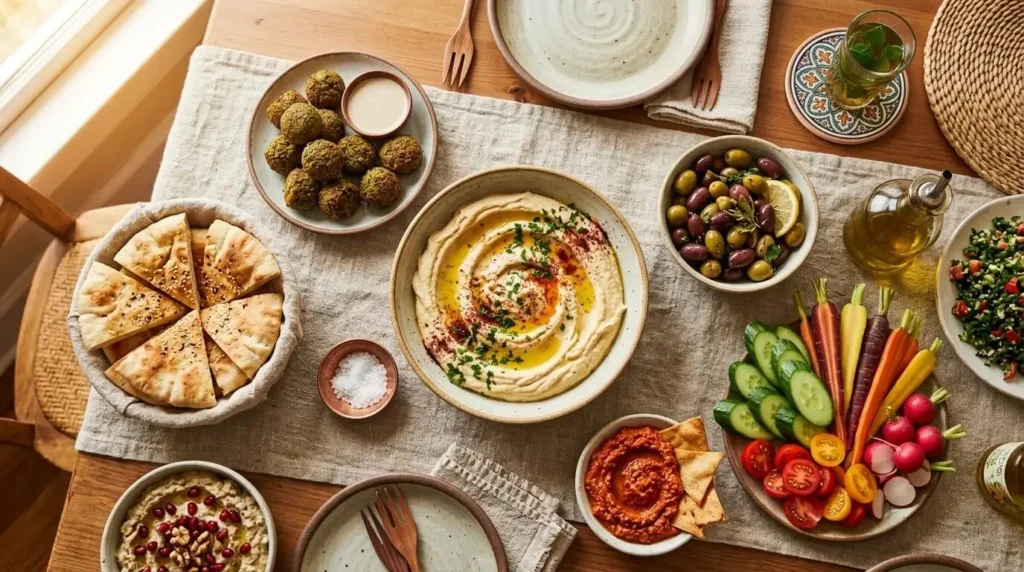
Classic Hummus from Scratch pairs well with:
- Warm pita bread or pita chips
- Fresh vegetables like carrots, cucumbers and bell peppers
- Falafel
- Grilled meats or vegetables
- As a spread for sandwiches or wraps
Storage and Make-Ahead Tips
- Refrigerator: Store in an airtight container for up to 5 days.
- Freezer: Freeze for up to 3 months. Thaw in the fridge overnight.
- Make-Ahead: Hummus often tastes even better the next day, once the flavors have had time to blend.
Nutritional Information (Per Serving, Approx.)
- Calories: 160
- Protein: 5g
- Carbohydrates: 12g
- Fat: 11g
- Fiber: 3g
- Sodium: 280mg
(Values are estimates and may vary based on exact ingredients used.)
Variations
Traditional Variation
Stick with the classic recipe above for an authentic hummus recipe with no extra additions.
Roasted Garlic Hummus
Roast a whole head of garlic and blend it in instead of raw garlic for a sweeter, milder flavor.
Spicy Hummus
Add 1/2 teaspoon of cayenne pepper or a spoonful of harissa paste for heat.
Herb Hummus
Blend in a handful of fresh parsley, cilantro, or basil for a fresh and herby twist.
FAQ Section
1. What is the secret to creamy homemade hummus?
The secret is blending tahini and lemon juice first, then slowly adding ice water while blending. This creates a light and whipped texture.
2. Can I make hummus without tahini?
Yes, but tahini gives hummus its classic nutty flavor. You can substitute it with Greek yogurt or extra olive oil and though the taste will be different.
3. Is hummus good for you?
Yes. Hummus is high in plant protein, fiber and healthy fats. Moreover, it is a nutritious choice for vegan and gluten-free diets.
4. Why is my hummus grainy instead of smooth?
Grainy hummus usually means the chickpeas weren’t cooked long enough, or the skins weren’t removed.
5. How long does homemade hummus last?
Homemade hummus lasts about 5 days in the refrigerator when stored in an airtight container.
6. Can I use canned chickpeas instead of dried
Yes. Canned chickpeas work well and save time. Just rinse them well before using.
Key Takeaways
- Classic Hummus from Scratch only needs a few simple, wholesome ingredients.
- Blending tahini and lemon juice first creates a creamy base.
- Ice water is the secret to a light and whipped texture.
- This homemade hummus recipe is naturally vegan and gluten-free.
- Hummus is a meaningful dish with deep roots in Middle Eastern culture.
Conclusion
Making Classic Hummus from Scratch is easier than most people think. With a few basic ingredients and a little patience, you can create a creamy and flavorful dip that beats anything from a store shelf. Whether you enjoy it with warm pita, fresh veggies, or as part of a bigger meal, this homemade hummus recipe is one you’ll want to make again and again. Give it a try and taste the difference for yourself.